Extending the Shell's Data Model
In this article, we will learn how to add attributes to our shell. For information about modifying or deleting attributes from the shell, scroll down to the bottom of this article.
Attributes can be added to the cloud provider shell or to the deployment path on the App template. Attributes on the shell are for general authentication/authorization purposes and for setting general configurations for the cloud provider integration, while attributes on the deployment path are typically settings that apply to the App’s VM. For example, Region applies to the cloud provider shell and Image ID applies to the deployment path. We will cover deployment path attributes in the next article.
CloudShell does not allow upgrading shells with deleted/modified attributes. Therefore, if you need to make an unsupported change to an attribute (for example, deleting an attribute or changing its type), you will need to remove the shell from CloudShell before you install the updated version.Adding an attribute to the shell
Adding attributes to the shell is done in the shell’s shell-definition.yaml file.
Let’s start by adding the VLAN Type attribute from the standard. Attributes that are included on the shell’s standard, like this attribute, need to be added to the capabilities section, under properties:
node_types:
 vendor.resource.ClpShell:
    derived_from: cloudshell.nodes.CustomCloudProvider
    capabilities:
      concurrent_execution:
        type: cloudshell.capabilities.SupportConcurrentCommands
      auto_discovery_capability:
        type: cloudshell.capabilities.AutoDiscovery
        properties:
          VLAN Type:
            type: string       # supported types are: string, integer, float, boolean, cloudshell.datatypes.Password
Let’s see how it looks on CloudShell. Install the shell:
shellfoundry installLog in to CloudShell Portal, and open the required domain to enable the Apps based on this cloud provider resource to be usable in this domain. In the Inventory dashboard, create a resource from the shell.
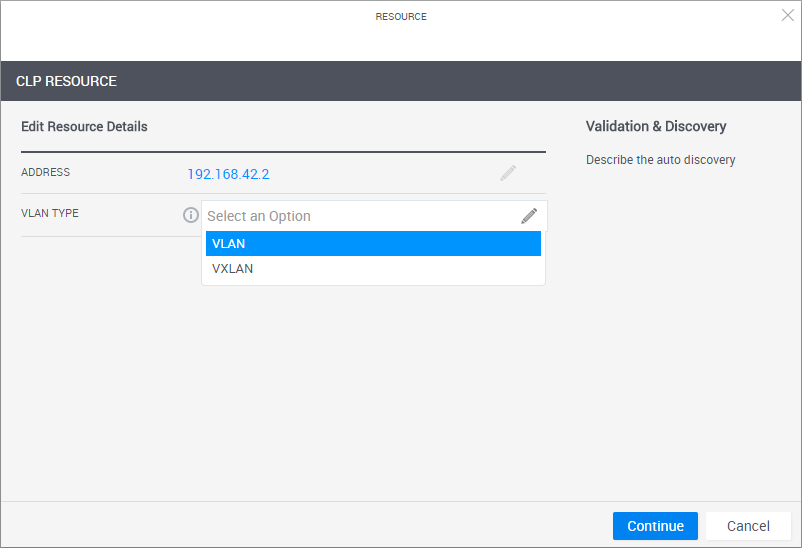
The attribute is displayed in the resource’s Validation & Discovery page:

Note that since the VLAN Type attribute is defined on the family, the attribute’s settings (possible values in this case) are inherited from the standard itself. The attribute’s name and type are required, but you can also set the attribute’s default value, description, and rules (tags property). For example:
properties:
  VLAN Type:
    type: string
    default: VLAN
    description: "Select the VLAN type to use - VLAN or VXLAN"
    tags: [setting, configuration]      # supported tags are: configuration, setting, search_filter, abstract_filter, include_in_insight, readonly_to_users, display_in_diagram, connection_attribute, read_only
However, if the attribute is not included in the shell’s family, you will need to set it both in the properties: section, and in the capabilities: section’s properties. We’ll add an attribute called “my discovery attribute”.
First we’ll add it to the capabilities section:
node_types:
 vendor.resource.ClpShell:
    derived_from: cloudshell.nodes.CustomCloudProvider
      capabilities:
        concurrent_execution:
          type: cloudshell.capabilities.SupportConcurrentCommands
        auto_discovery_capability:
          type: cloudshell.capabilities.AutoDiscovery
          properties:
            my discovery attribute:
              type: string
And then we’ll add it to the properties: section as well (note that this section is missing, so you’ll need to add it directly under the derived_from: line:
node_types:
 vendor.resource.MyCustomClp1:
    derived_from: cloudshell.nodes.CustomCloudProvider
    properties:
      my discovery attribute:
      	type: string
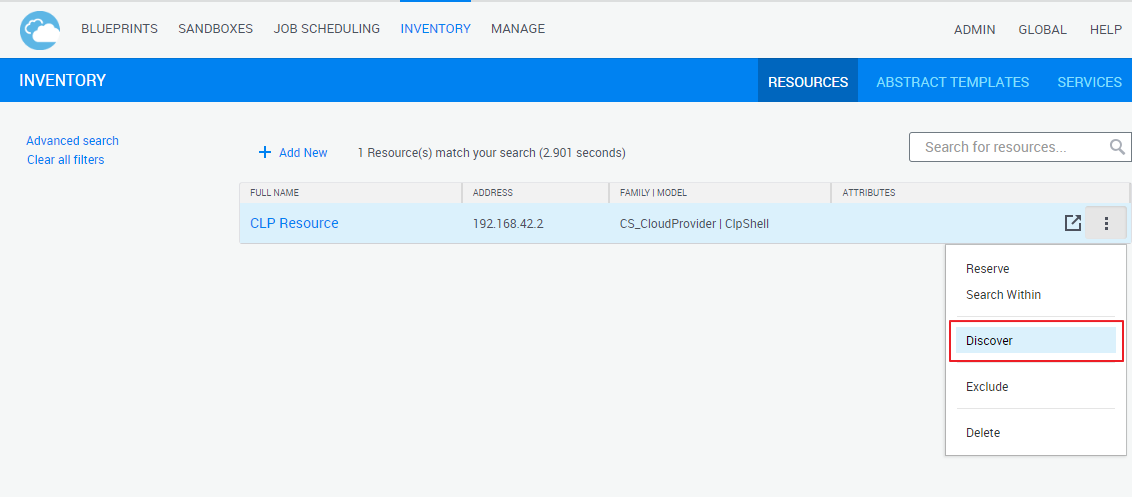
Install the shell and return to CloudShell Portal, in the Inventory dashboard, click the resource’s more actions button and select Discover:

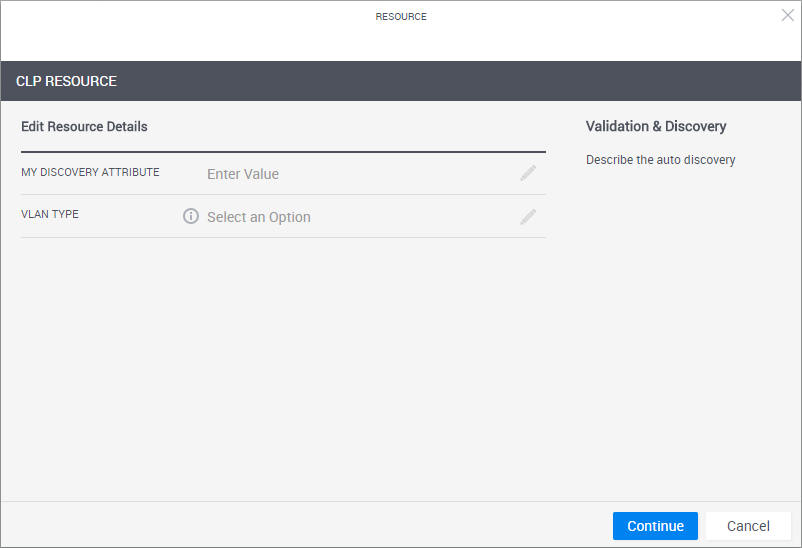
The resource’s Validation & Discovery page is displayed, showing the new discovery attribute we created.

You can also set additional settings. Since this attribute is not included in the family, you can also set possible values (constraints property).
For example:
properties:
  my discovery attribute:
    type: string
    default: value 3
    description: "This is my discovery attribute."
    constraints: [value 1, value 2, value 3]
    tags: [setting, configuration]
Modifying an attribute on a shell
You cannot modify attribute properties type and name, and any attributes that are associated with the shell’s family as this will affect other shells that use this family. The family attributes are listed in the shell’s standard. To find the attributes defined in the shell’s standard, see the documentation page of your shell’s standard.
Deleting an attribute from a shell
Deleting any of the shell’s default attributes (those that come with the standard) is not supported. It is also not possible to customize a 2nd Gen shell’s data model (families and models) and its structure, which is as defined in the Cloud Provider Shell Standard.
 CloudShell Developer Guide